Themes
Description
Use themes to customize the appearance of a group of webcasts.
After creating a theme, you can assign it to any number of webcasts you create.
Where required, you can alter the theme in this section.
All webcasts assigned the updated theme will then be updated.
Steps
To create a theme, click the "Themes" entry in the navigation panel. A list of all previously configured themes will appear.
Click the [Create] button to open a new form, or click on an existing theme to modify a form.
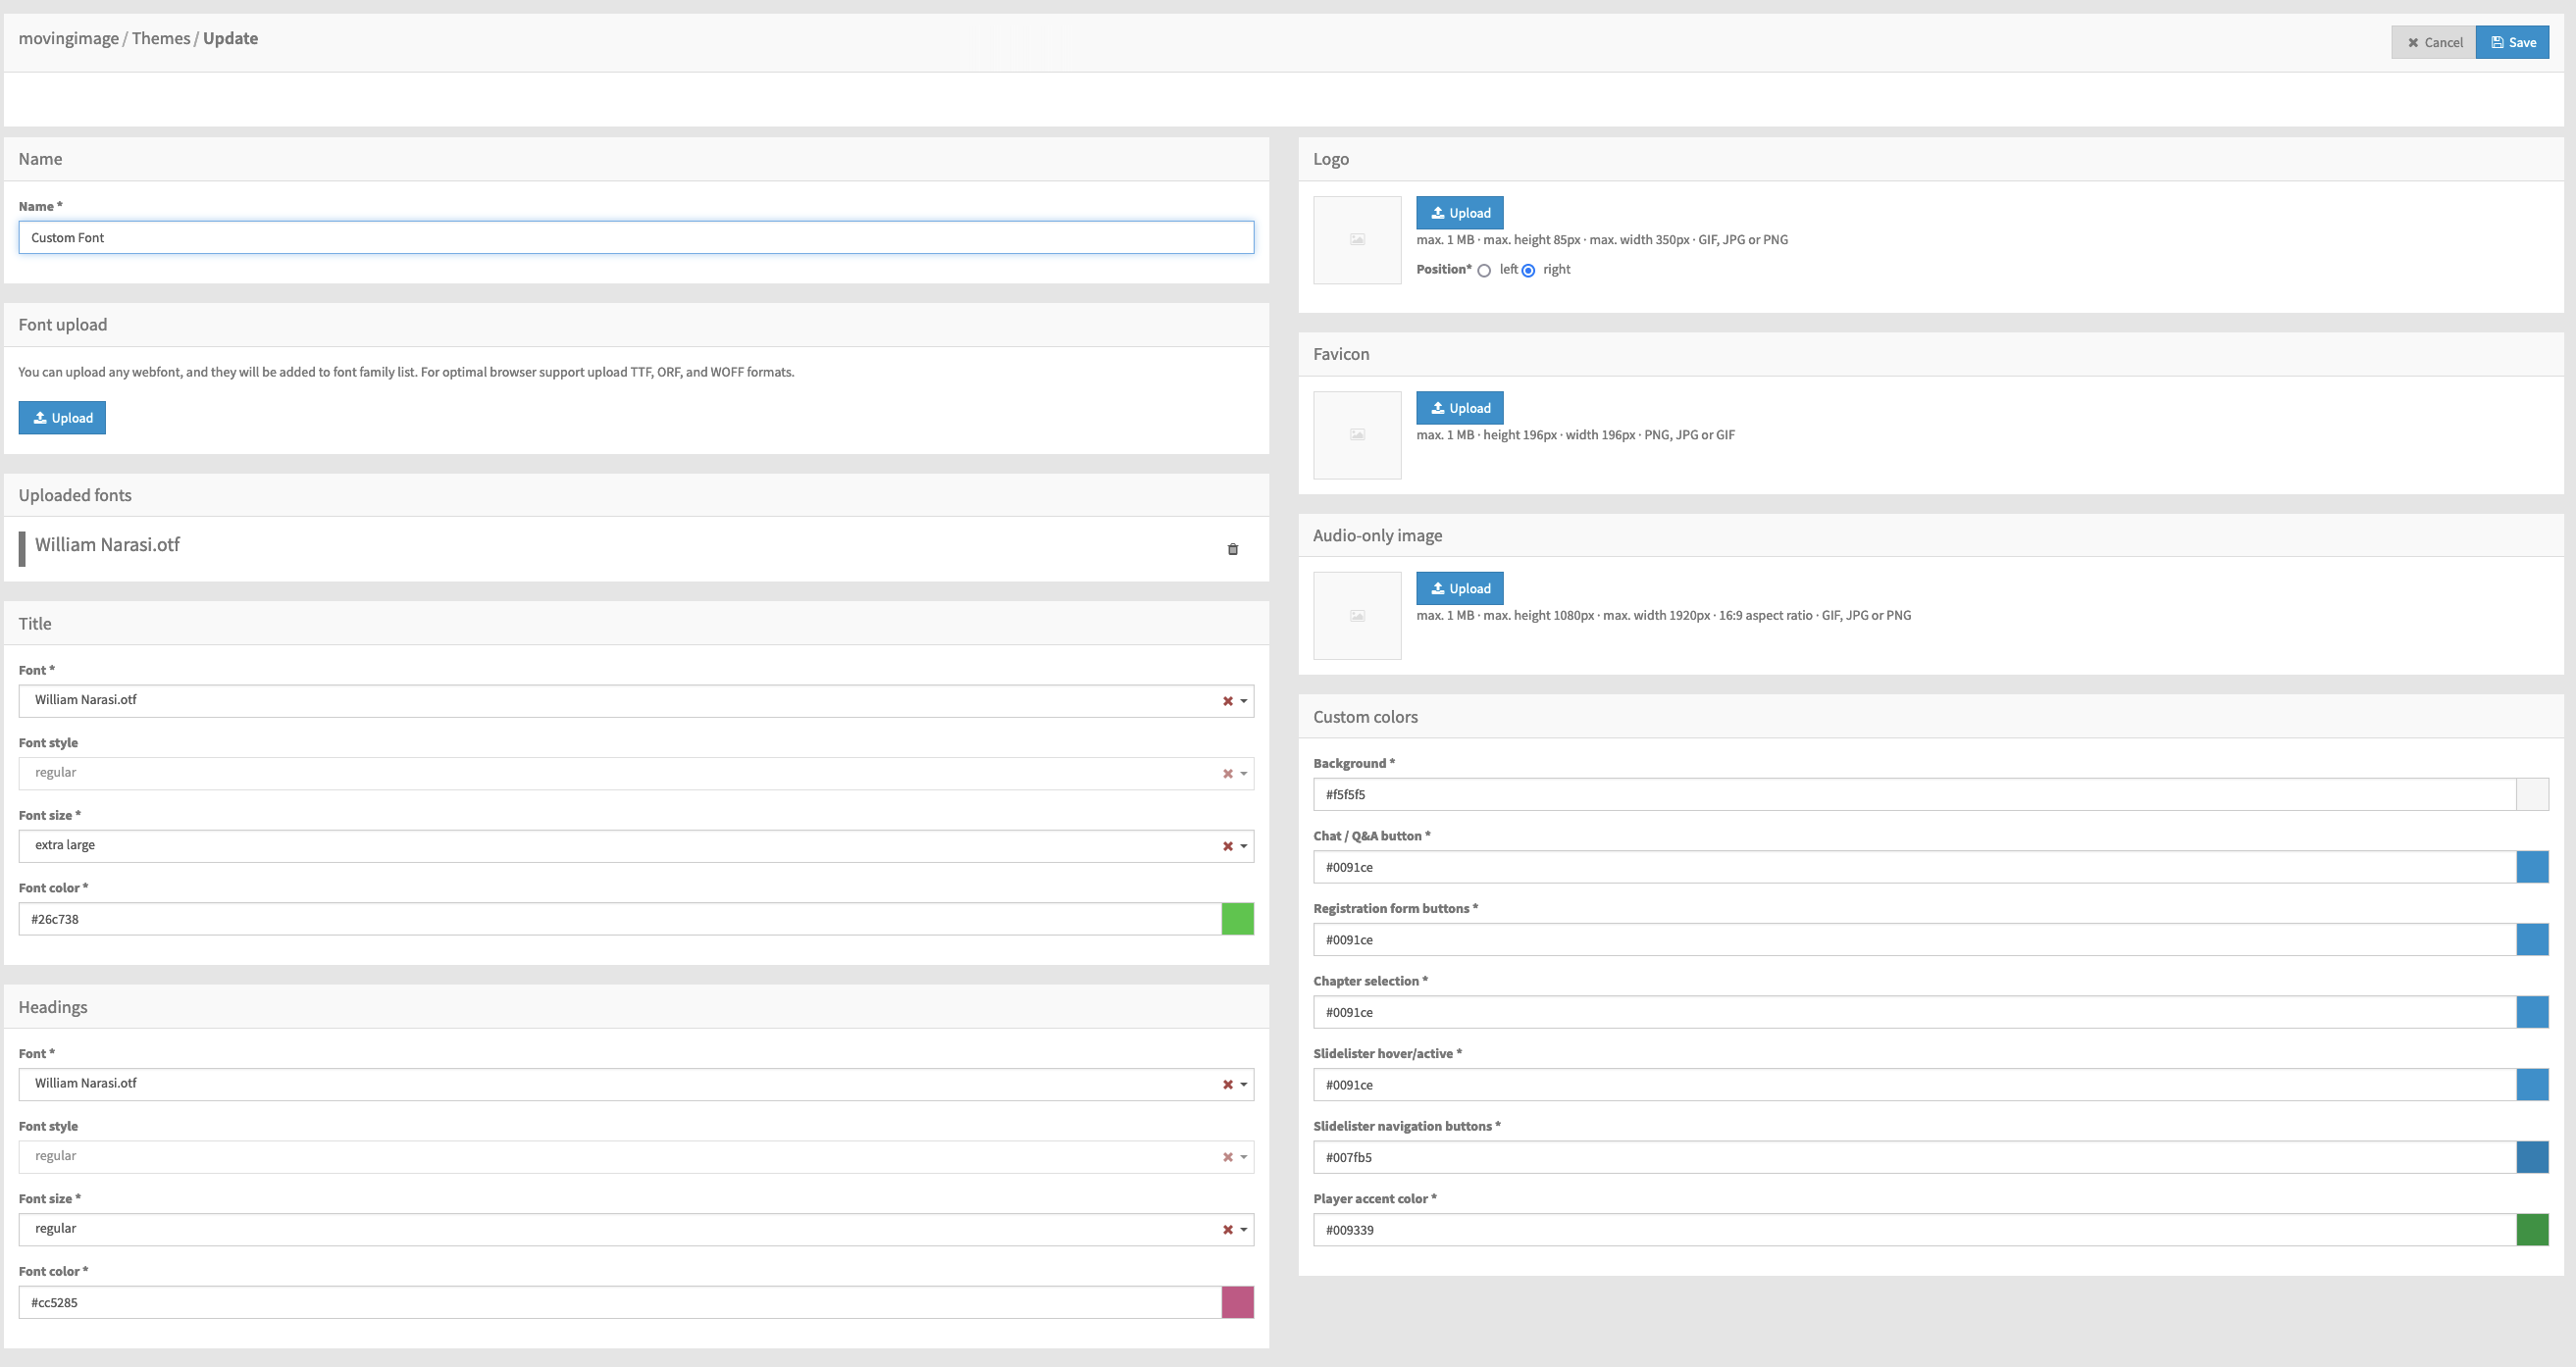
Customize the data in the following edit panes:
Name:
Name
give the theme a name
Font upload:
Upload
upload a custom corporate identity webfont to add it to the font family list (recommended formats: TTF, ORF and WOFF).
Please reach out to Professional Services to upload a custom webfont.
Font use
Ensure that the font uploaded is licensed and/or does not violate third-party rights.
Title:
Font
select the desired font from the drop-down menu - uploaded custom fonts will be displayed here.
Font style
select the desired font style from the drop-down menu
Font size
select the desired font size from the drop-down menu
Font color
enter a valid font color in HEX or alternatively, click the color box to open a color picker
Headings:
Font
select the desired font from the drop-down menu
Font style
select the desired font style from the drop-down menu
Font size
select the desired font size from the drop-down menu
Font color
enter a valid font color in HEX or alternatively, click the color box to open a color picker
Logo:
Upload
upload an image file to be used as the logo
Position
use the radio buttons to position the button on the left or the right side of the webcast page
Favicon:
Upload
upload an image file to be used as the favicon for the webcast page (ICO image containers may also be used)
Audio-only image:
Upload
upload an image file to be used when an Audio-only webcast is configured
Custom Colors:
Background
enter a valid HEX value or click the color box to open a color picker
Chat / Q&A button
Registration form button
Chapter selection
Slidelister hover/active
Slidelister navigation buttons
Player accent color
Click the [+ Create] button again. The new theme will be saved and available to select when configuring a webcast (see the "Appearance" chapter for more information.)
You can also update, duplicate, delete or set the theme as default using the options in each theme's context menu (see the "Deleting a Theme" chapter for information about deleting):
.png)
Update: opens the chosen theme's edit pane (this is essentially the same as simply clicking the theme in the list).
Duplicate: copies the settings from the chosen theme and creates a new theme with the same settings.
The duplicate theme's edit pane will open, allowing you to give it a unique name and modify any of the copied settings.
Click the [Duplicate] button in the top right of the page to save the new theme.
Set as default: sets this theme as the default choice when creating new webcasts.
Delete: delete this theme from the list.
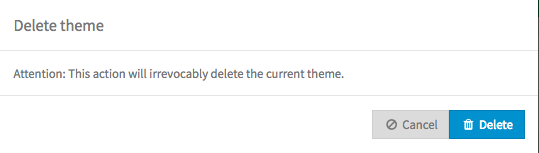
Delete a theme
You can delete a theme using the [Delete] button in the context menu of the theme you wish to delete. (If you only have one theme, you cannot delete it.)
.png)
If your theme is not in use by any webcasts, you will be presented with a simple confirmation dialog. Click the [Delete] button to confirm.
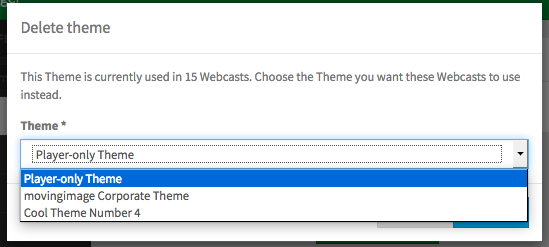
If your theme is in use by any webcasts, the confirmation dialog will let you select another theme for those webcasts to use instead. Once you've chosen, click the [Delete] button to confirm.