VideoManager
In order to import a recording of a live webcast stream into a VideoManager, you must define your VideoManager here and provide the necessary access data. Doing this allows you to enable automatic importing of the recording of any of your webcasts into the defined VideoManager. In addition, this VideoManager can be used to assign a video that will play during the pre-live, post-live, and on demand states of your webcast. Videos are then played out directly from the defined VideoManager in the webcast.
Steps
To create a new VideoManager in the WebcastManager, proceed as follows:
In the navigation panel, click "VideoManager". In the editing area, you will see a list of all previously created VideoManagers.
Click the blue [Create] button.
The create form will open. Enter the following information for your VideoManager:
Fields marked with "*" are required.
VideoManager:
*Name:
This name will appear in the Webcast Configuration area when you have the option of selecting a video from a VideoManager.
*VideoManager ID:
This is the ID number of the VideoManager you wish to connect. If you do not know it, contact Customer Relations.
*VideoManager Host:
The URL to the VideoManager API. The standard URL is https://api.video-cdn.net/
*Platform Auth URL:
The URL to the Platform Authentication service. The standard URL is https://login.movingimage.com/auth/realms/platform/protocol/openid-connect/token
*VideoManager User:
A username (email address) that has rights to connect to the VideoManager ID.
*VideoManager Password:
Password for the user above.
*Playout Host:
The URL to the Video Playout service. The standard URL is https://d.video-cdn.net/
Note that the VideoManager Host, Platform Auth URL and Playout Host values are different if you are using a custom VideoManager instance. Please contact Professional Services if you require further assistance.
Click the [Validate] button to check the validity of your entries. The following message will appear if successful:

After validating successfully, you may optionally set defaults for any of the pre-live video, post-live video or upload channel. These defaults are used when creating new Webcasts; they can be overridden on a per-Webcast basis.
Default Pre-live Video, Default Post-live Video:
Channel:
Select from the list of available Channels in the connected VideoManager.
Video:
Select from the list of available Videos in the Channel selected above. The
 icon indicates an unpublished video; these cannot be selected as a default video.
Default Upload Channel:
Channel:
Select from the list of available Channels in the connected VideoManager. The Webcast system will upload a recording of the live presentation to this Channel.
Click the [Save] button to save your entries. The newly created VideoManager will appear immediately in the list of all VideoManagers. You can edit it again later by clicking it.
Upload a Webcast Stream to VideoManager Pro
Description
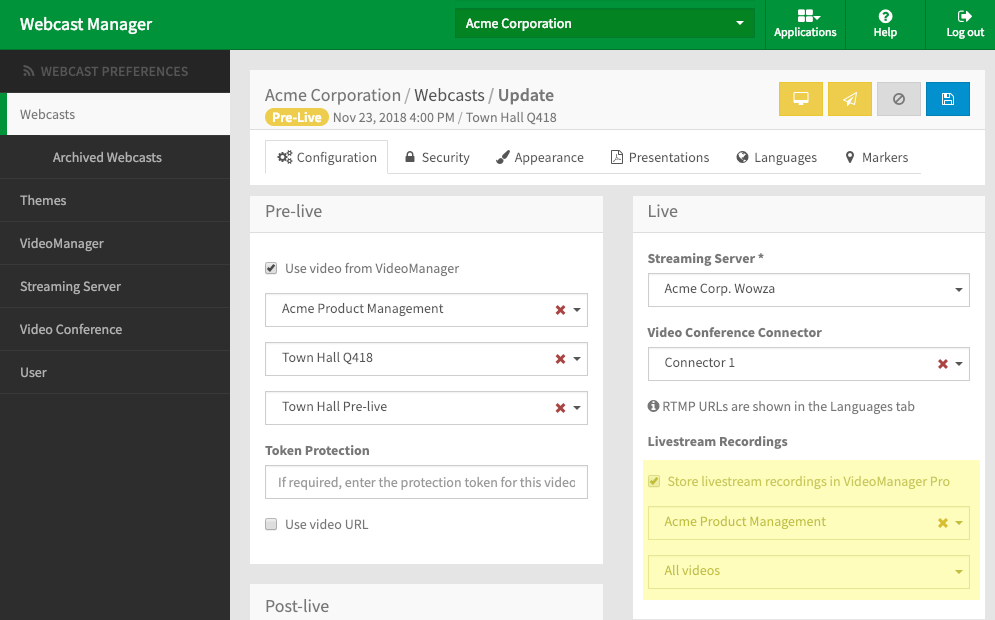
As mentioned in the previous section, you can determine to which VideoManager Pro your webcast stream can be uploaded.
Steps
The following steps need to be done only once before uploading a video to VideoManager Pro.
Link your Webcast account to a VideoManager Pro. If you have not linked your account, follow the steps described in chapter "Setting up a VideoManager".
When you configure a webcast, select the appropriate VideoManager Pro and link it to the Webcast. This is described in the "Live" chapter.
If a VideoManager is marked as default in the VideoManager list, it will be automatically selected in the VideoManager Pro selection list.
Additionally, if there is a default upload channel set for a VideoManager, it will be automatically selected in the Channel selection list.
The webcast stream will be uploaded once the status 'live' is switched to 'post-live' in the WebcastOperator (see "Controlling a Live Webcast").
The title of the webcast corresponds to the name of the video file. The publication status of this video is automatically set to "Released" in your VideoManager Pro.
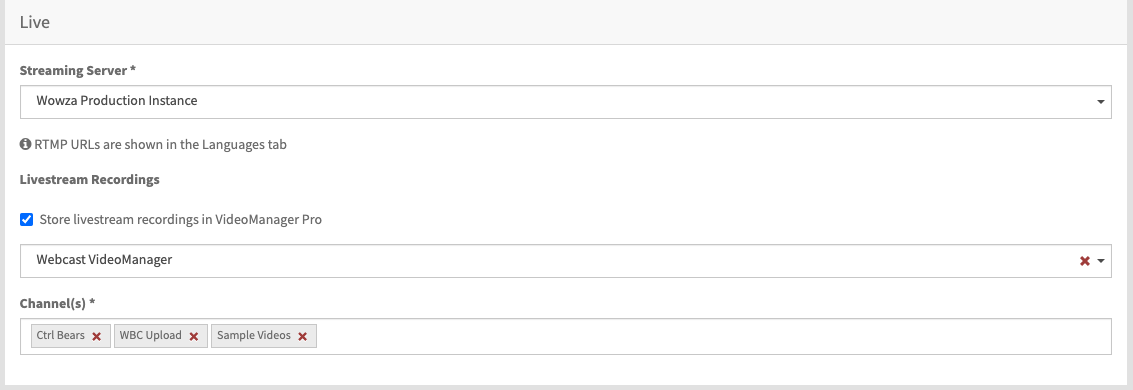
Channel Selection
In Webcast Manager, you can upload the recorded livestream to one or more VideoManager Pro channels.
The recorded livestream inherits the owner group of selected channel in VideoManager Pro automatically.
If multiple channels are selected, the video will be uploaded to each channel, gets a dedicated video id and will be automatically assigned to the owner group of the channel.
If the owner group of the selected channels are identical, only a single video will be uploaded; otherwise, several copies of the video each with a unique video id will be stored in VideoManager Pro.
Video on Demand
As well, you can save a recorded livestream for later playback. This is done automatically whenever you upload a video to VideoManager Pro; the video is assigned to be used as video on demand.
If you store a livestream recording in multiple channels belonging to different groups, the video of the first selected channel will be used for playout when the Webcast event is set to "On Demand"."
You can override the automatic assignment of on demand video by manually changing the configuration.
To do this, navigate to the Languages tab in Webcast Manager.
In the On Demand section, enable "Use video from Webcast Manager".
In the following section, select the VideoManager Pro account, desired channel and the current webcast.
.png)
If you enable Video on Demand, the recorded livestream can be viewed in the Webcast Consumer view.
The video that will be played back is stored in the specified VideoManager Pro account, and only that video will be used for Video on Demand.