Configuration
When setting up a webcast, you can use the "Configuration" tab to enter general settings.
To access this tab, navigate to the webcast you want to configure and select the "Configuration" option.
Webcast currently does not support security features available in VideoManager Pro. If you have enabled geo protection, the video cannot be played back.
Description
Here you can switch the status of your webcast to "On Demand". If the on demand videos have not yet been specified, this will not be possible. Note the disabled button in the image below:

Provide source for on demand
You can set up a source for the "On Demand" state of your webcast in the "Languages" tab; this allows you to select a localized video for each language stream. If the webcast is configured to upload the live stream to a VideoManager, the on demand sources will populate automatically when the webcast status is switched from "Live" to "Post live".
The button will be clickable as soon as the on demand videos are correctly configured:

The action of switching the status to "On Demand" cannot be undone.
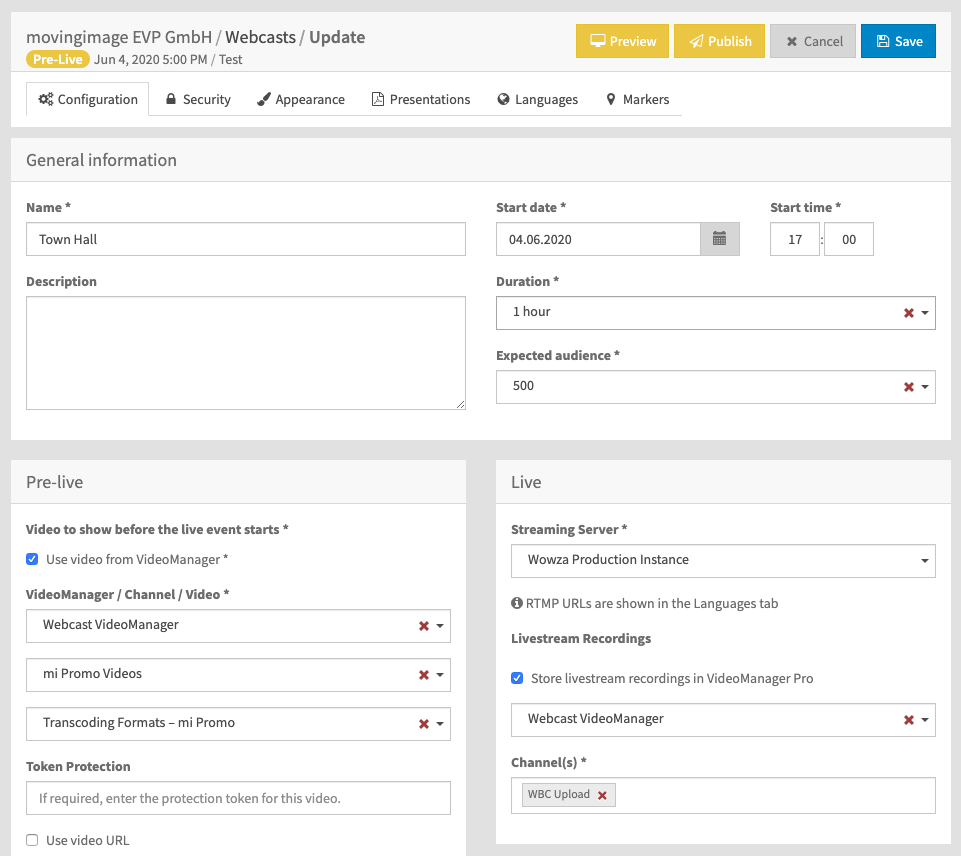
General information
This section shows the general information area found in the Configuration tab.

Settings
General Information | |
|---|---|
Name: | Required. This is the Event Name and will be shown in the main list of webcasts and to viewers in WebcastConsumer. It may also be localized for different languages. See Languages for more details. |
Description: | Optional: Add information about your event here. This will be displayed in the pre-live state in WebcastConsumer, and as the description when uploading the recording to VideoManager Pro. It may also be localized for different languages. See Languages for more details. |
Start Date, Start Time | Required. Values here will appear in the main list of webcasts, and in emails to potential viewers. This helps with scheduling and reminding viewers of webcast events. |
Duration | Required. Choose a time duration for your webcast from the dropdown menu. |
Expected audience | Required. Choose the expected audience for your webcast from the drop down menu. |
Any event that is in live state for more than one hour after its end time is automatically switched to post-live state.
Example: The start time of an event was configured to 9:00 and the duration of the event is 2 hours. The event starts with a delay of 15 minutes at 9:15. If the event is still in live state at 12:15, it will be automatically switched to post-live state.
When using the Video Conference Connector, the selected connector is reserved for you during the scheduled time. If your event runs for longer than its scheduled time, and the selected connector is reserved for another event, you could be disconnected and your event will end.
Pre-Live
Webcast currently does not support security features available in VideoManager Pro. If you have enabled geo protection, the video cannot be played back.
You can set up a source for the "Pre-live" state of your webcast here. The source chosen here is what will stream prior to the webcast switching to "Live".
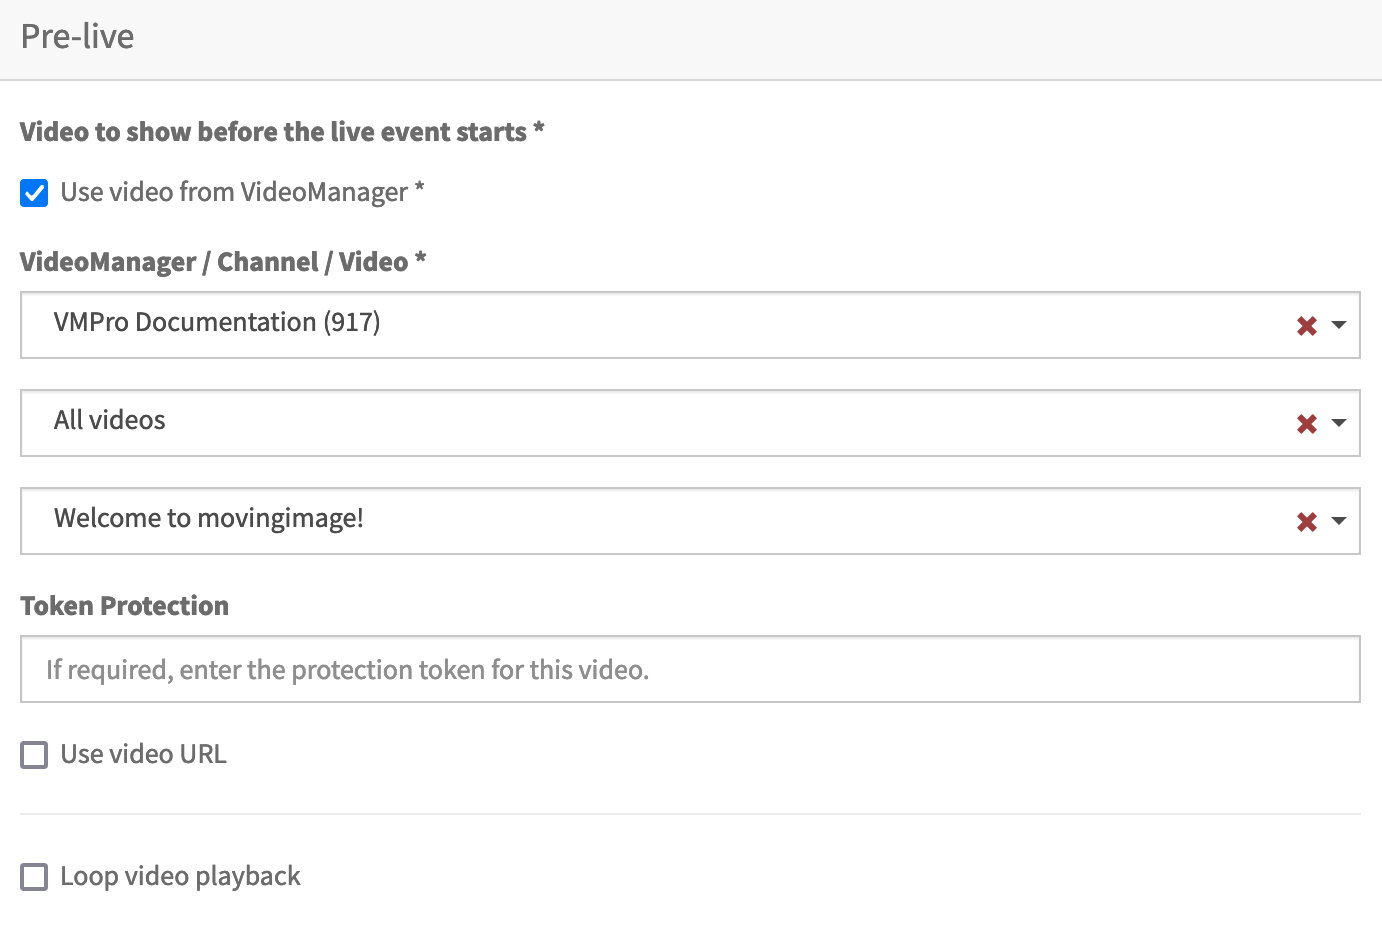
First, select which type of source you want to use for your webcast. To do this, select the corresponding check box. Depending on your selection, you must perform further configuration. The following options are available:
1. Use video from VideoManager
This option requires that at least one VideoManager has been set up.
If you want to use a video from VideoManager, select the desired VideoManager, channel, and video. These are selected from the corresponding drop-down menus. By default, the settings you set in the 'VideoManager" option in the navigation bar are applied here.
The channel structure in the drop down menu reflects the order of the channels (including the sub-channels) in your VideoManager .
Enter the "shared secret" security code in the Token Protection field if the video you would like to use is token protected. See "Security Policy Configuration" in the VideoManager Pro Administration documentation for more information about where to find the shared secret code.
Click "Loop video playback" so short Pre-live video clicks and play constantly in a loop. Note: After the first playback the looped video gets muted.
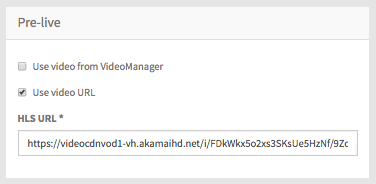
2. Use video URL
If you have selected this option for your stream, you can define the appropriate HLS URL.
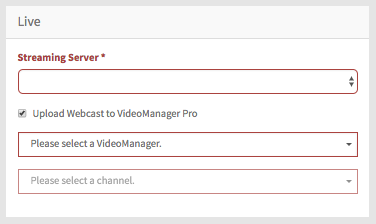
Live
Settings for the live stream are entered in the Live area. The empty form appears as below:
When complete and saved, the form appears as in the example below:
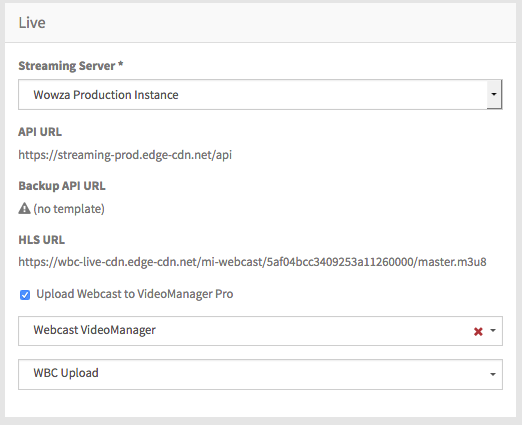
Parameter | Description |
|---|---|
Streaming server | From the drop-down menu, select a streaming server for the live stream. |
Upload Webcast to VideoManager Pro | Use this checkbox if you would like to upload your live stream to a VideoManager. The stream will upload once the webcast status is switched from "Live" to "Post live". Select a VideoManager and a channel to upload to using the corresponding drop-down menus.
|
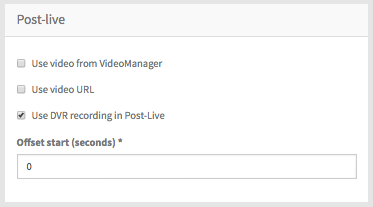
Post-Live
Webcast currently does not support security features available in VideoManager Pro. If you have enabled geo protection, the video cannot be played back.
Settings for the stream which will be available after the actual event are made here in the "Post-live" pane.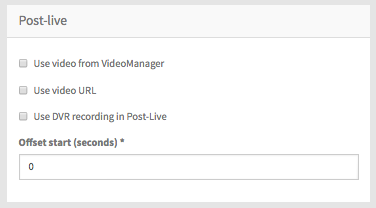
First, select which type of source you want to use for your webcast. To do this, select the corresponding check box. Depending on your selection, you must perform further configuration. The following options are available:
1. Use video from VideoManager
This option requires that at least one VideoManager has been set up. By default, the settings you set in the 'VideoManager" option in the navigation bar are applied here.
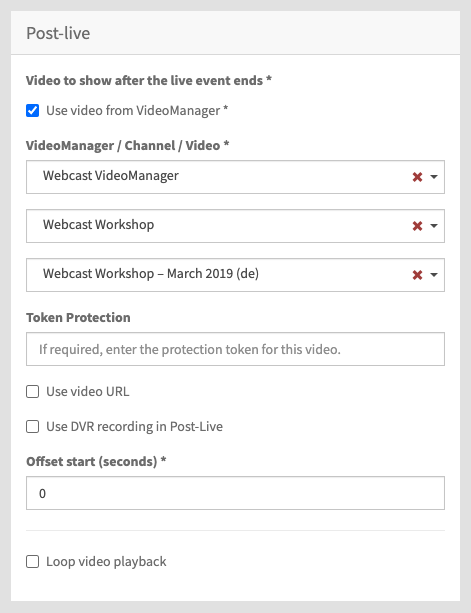
Enter the following settings:
Parameter | Description |
|---|---|
VideoManager selection | From the drop down menu, select the desired VideoManager. |
Channel selection | From the drop down menu, select the channel in which your desired video is located.
|
Video selection | From the drop down menu, select the desired video. |
Token Protection | Enter the "shared secret" security code in the Token Protection field if the video you would like to use is token protected. See "Security Policy Configuration" in the VideoManager Pro Administration documentation for more information about where to find the shared secret code. |
Offset start (seconds) | Define the starting time of the video stream (in seconds). If the value is set to 0, the specified video starts from the original beginning. |
Loop video playback | Click "Loop video playback" so short Pre-live video clicks and play constantly in a loop. Note: After the first playback the looped video gets muted. |
2. Use video URL
If you have selected this option for your stream, you can define the appropriate HLS URLs.
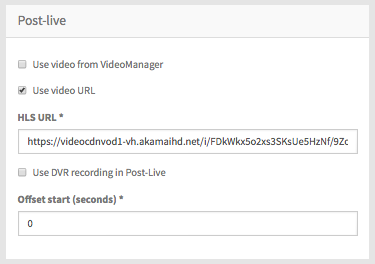
Enter the following settings:
Parameter | Description |
|---|---|
HLS URL | Enter the appropriate HLS URL. |
Offset start (seconds) | Define the starting time of the video stream (in seconds). If the value is set to 0, the specified video starts from the original beginning.
|
3. Use DVR recording in Post-live
If you want to play out the DVR recording of the live event, select this option.
DVR retention
On-demand content will be deleted 14 days after the event and can no longer be accessed by Webcast audiences.
Enter the following settings:
Parameter | Description |
|---|---|
Offset start (seconds) | Define the starting time of the video stream (in seconds). If the value is set 0, the specified video starts from the original beginning. |
Note
Videos in Post-Live state that use the DVR recording are only available for a limited time. It is recommended to switch the state of the even to "On Demand" to make the video available without any limitation. Configuration of an event to "On Demand" can be found here.
On-Demand
Webcast currently does not support security features available in VideoManager Pro. If you have enabled geo protection, the video cannot be played back.
On Demand
Webcast currently does not support security features available in VideoManager Pro. If you have enabled geo protection, the video cannot be played back.
Description
Here you can switch the status of your webcast to "On Demand". If the on demand videos have not yet been specified, this will not be possible. Note the disabled button in the image below:
Provide source for on demand
You can set up a source for the "On Demand" state of your webcast in the "Languages" tab; this allows you to select a localized video for each language stream. If the webcast is configured to upload the live stream to a VideoManager, the on demand sources will populate automatically when the webcast status is switched from "Live" to "Post live".
The button will be clickable as soon as the on demand videos are correctly configured:
The action of switching the status to "On Demand" cannot be undone.