- 16 Oct 2025
- Print
Event Access
- Updated on 16 Oct 2025
- Print
Before you begin
Where required, you can restrict access of your livestreaming event. The rest of this article describes the ways you can do so.
Available options for restricting events
You restrict access to your event under the Event Access tab. Also you can configure a registration form for your event.
.png)
Event privacy option | Description |
|---|---|
Public - anyone with the link | If enabled, anyone can access the event. Optionally you can ask your viewers to enter e-mail address and name before they can see the content. You can also let your viewers verify their e-mail address with a pin code. |
Restricted access | If your event contains internal information you can restrict access and use our available access control methods: Single-Sign On authentication, Restrict access to specific email adresses, Require access code. These options can also be combined with each other. |
Please note
You can change the access settings for an event after it has ended. For example, you can host a public livestream but only grant access to the recording to a limited number of people.
Available Event privacy option combinations
Event privacy options and combinations | Description |
|---|---|
Single-Sign On authentication | If enabled, viewers need to authorize using Single Sign-On to access the event. This option must be first configured by our Professional Services. Consult this article if you want to learn more. |
Restrict access to specific email adresses | If enabled, only viewers that are on the attendee list can access the event. Optionally, you can ask your viewers to provide their name in the registration form. If you want to use this option you need to provide a list of allowed participant emails. Both manual- and CSV-import are supported. You can also let your viewers verify their e-mail address with a pin code. |
Restrict with access code | If enabled, viewers need an access code to access the event. By default we generate a 6-digit code but you can edit it to define your own. We support text codes between 6 and 30 characters. |
Single-Sign On authentication + Restrict access to specific email adresses | Viewers can use either Single-Sign On or a whitelisted email adress / domain. |
Single-Sign On authentication + Access Code | If enabled, viewers need to authorize using Single Sign-On to access the event. An access code is required in addition to other selected access methods. |
Restrict access to specific email adresses + Restrict with access code | Only viewers that you allow (by email) can access the event. An access code is required in addition to other selected access methods. |
Single-Sign On authentication + Restrict access to specific email adresses + Access Code | Viewers can use either Single-Sign On or a whitelisted email adress / domain. The access code is required in addition to other selected access methods. |
Additional requirements
There are also additional requirements that can be combined with the options in restricted access events and public events.
Single-Sign On authentication
You can require all viewers to authenticate through your configured Identity Provider. This option is only visible if it is enabled in your channel. If you want to activate this feature please contact our Professional Services team.
Optionally, you can restrict access to selected SSO users or groups.
.png)
The following SSO parameters are supported:
.png)
SSO emails
SSO groups - require configuration by our Professional Services Team
SSO UID - require configuration by our Professional Services Team
Restrict access to specific email addresses
You can control who can register to your event by defining a list of allowed e-mail addresses.
.png)
To start creating a list of participants, select “Restrict access to specific email addresses” option and click “Add attendees” button.
A new window will be visible on the screen. You can start adding attendees by typing e-mail addresses or reach a whole group of people by using a wildcard.
.png)
How to use
You can add either a fully-qualified e-mail such as michael@company.com, or a wildcard domain such as *@movingimage.com.
In the second case, note that the wildcard * matches all e-mails under the movingimage.com domain.
Alternatively, you can use CSV file import to add long lists of e-mails.
.png)
How to use
Your CSV file needs to fit the following criteria:
Only 50000 emails can be uploaded in a single file
CSV file should only include 1 column
The delimiter in the file should be a comma (,)
If the list includes duplicates, the email will be only added once
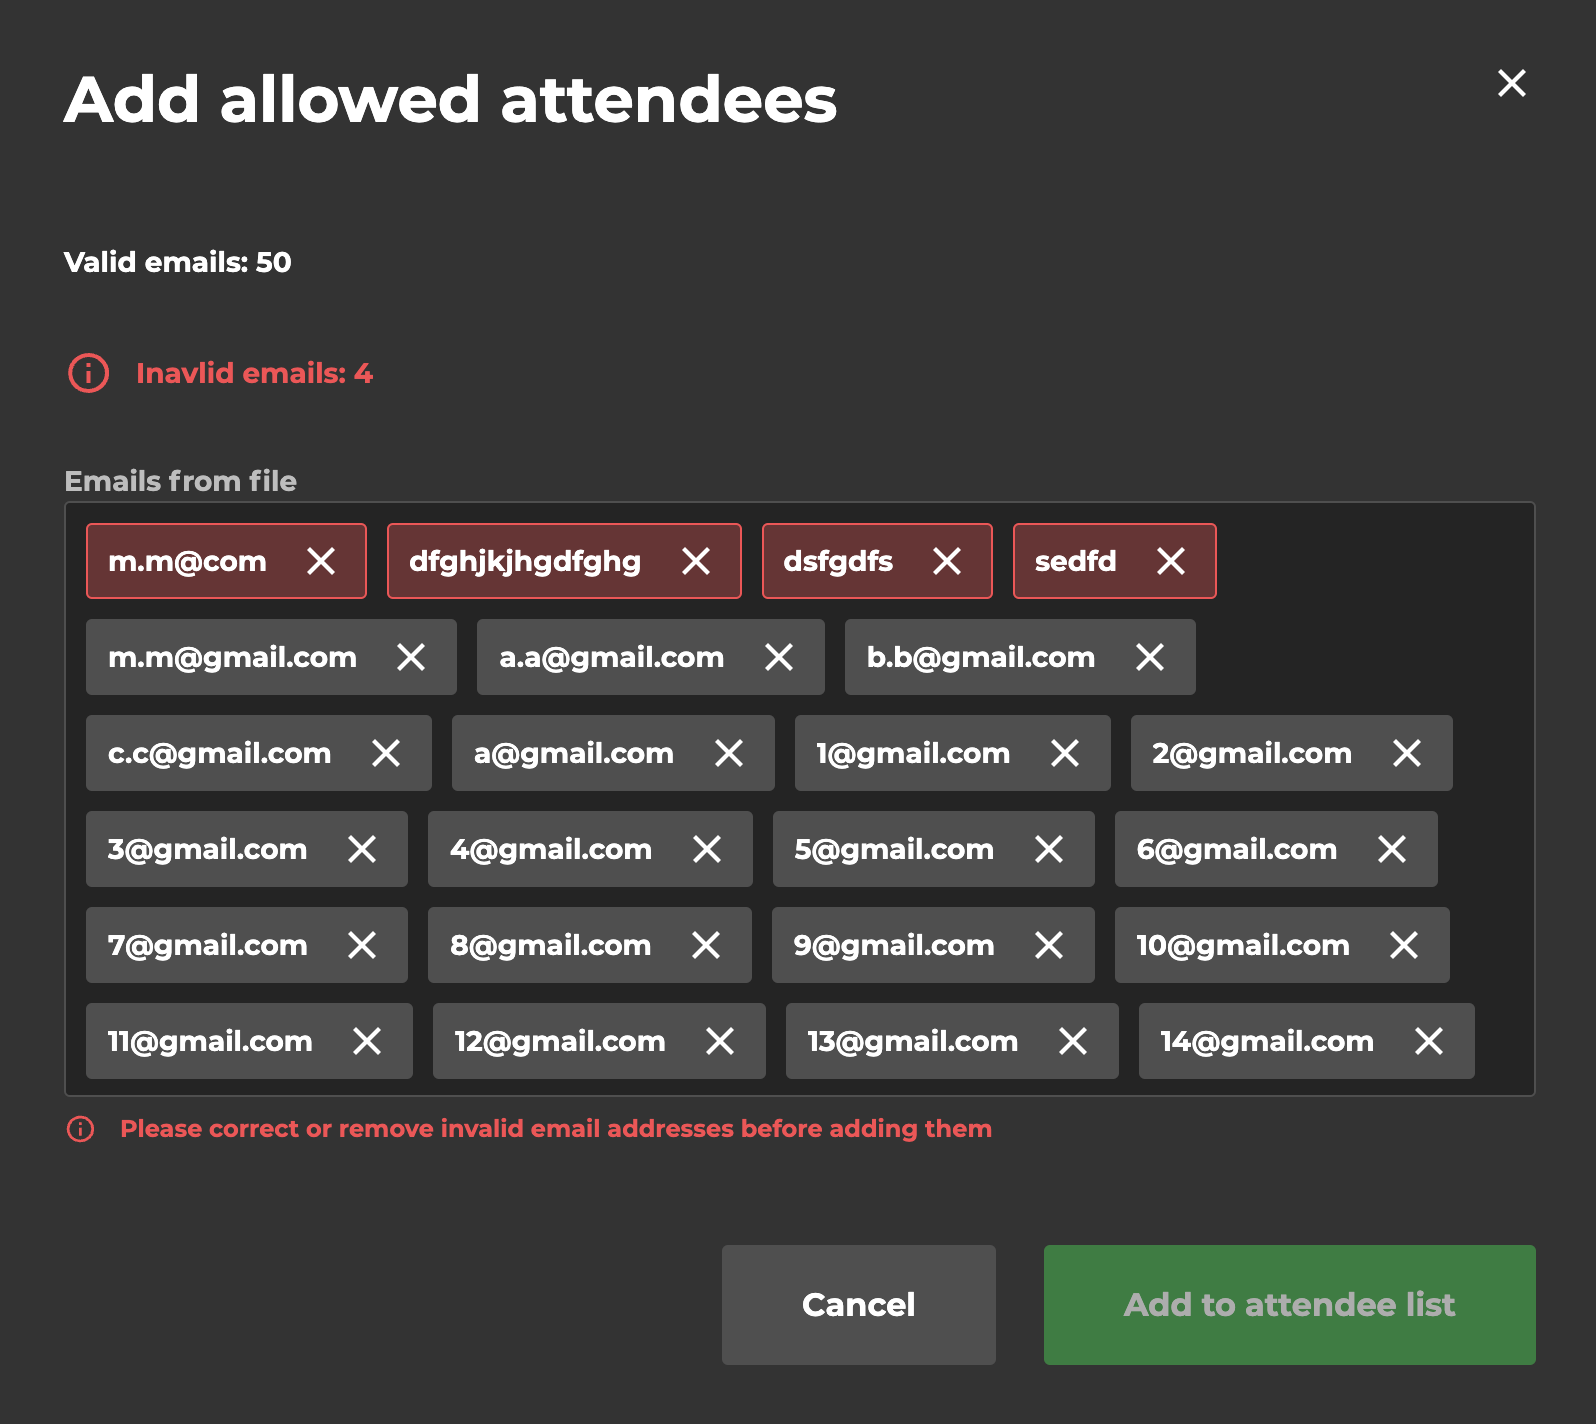
After importing the CSV file you will see how many entries are correct and how many are invalid. You can click on invalid entries to correct them or delete from the list. After all entires are correct, you can save the list.

Important note
LiveStream Pro will ignore all duplicates and transform all e-mails to lower-case.
After adding all your attendees you can see the whole list of addresses. Each e-mail can be deleted or you can delete the whole list. In case you need to add more attendees, just go through the process above again.
.png)
Regarding pin verification
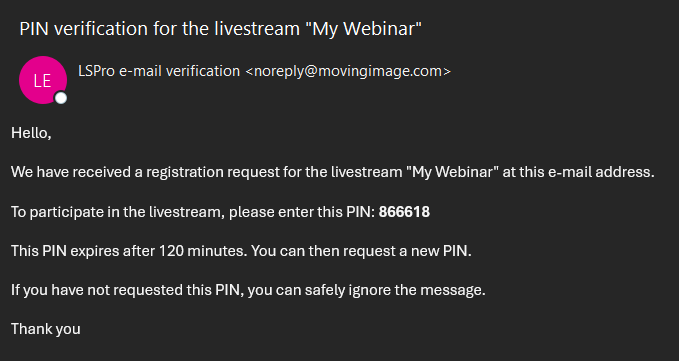
If you activate the email verification with pin code all users that join the event will receive a mail from ‘noreply@movingimage.com’ with a pin code. This pin code is needed to join the event and expires after 120 minutes.
Restrict access with an access code
You have the option to control who can enter your event with an access code, that is provided by you in the invitation before the event.
When you choose this option, you can use the auto generated access code or change it to a custom one.
.png)
Registration
For public events and events that have restricted accesses to specific email adresses it is also possible to configure a registration form.
.png)
If you click on the ‘Edit form’ button you can define which registration fields you would like to activate for your event.
Regarding the chat
If you use the registration form for your event and want to use the non-anonymous chat, all messages from users will be displayed with the user's email address. If you also ask for a first and last name in the form, this name will be used as the chat name instead. If you want to learn more about the chat click here.
.png)
The configured free-text fields in the registration form are mandatory fields and have to be submitted by the viewers before they can enter the event. After the event has concluded you will be able to download an registered users report containing all collected data.
Verification via pin code
.png)
If you activate the toggle ‘Require email verification with pin code’ all users that want to access the livestream will receive a mail from noreply@movingimage.com.

In this mail they will receive a PIN that they have to enter in order to access the livestream.
.png)
.png)
